Showing posts with label how-to. Show all posts

Sunday, January 21, 2024

Making a Pop-up Octopus

Last week, our group gathered to look at some pop-up books and we made some pop-ups too! We started by making some simple cut pop-up shapes then finished with a pop-up octopus card, in many colours!

If you would like to make a simple pop-up octopus, you can follow along right here. You will need two sheets of cardstock, scissors, and glue.

I created this 3-piece octopus image that you can download here as a PDF. This is a one-page document that you can print on standard printer paper though I recommend printing it on cardstock for added strength.

Follow these steps to make your pop-up card. You can click on the photos to make them larger if necessary.

Step 1
Download the PDF, print it, and cut out the three pieces.
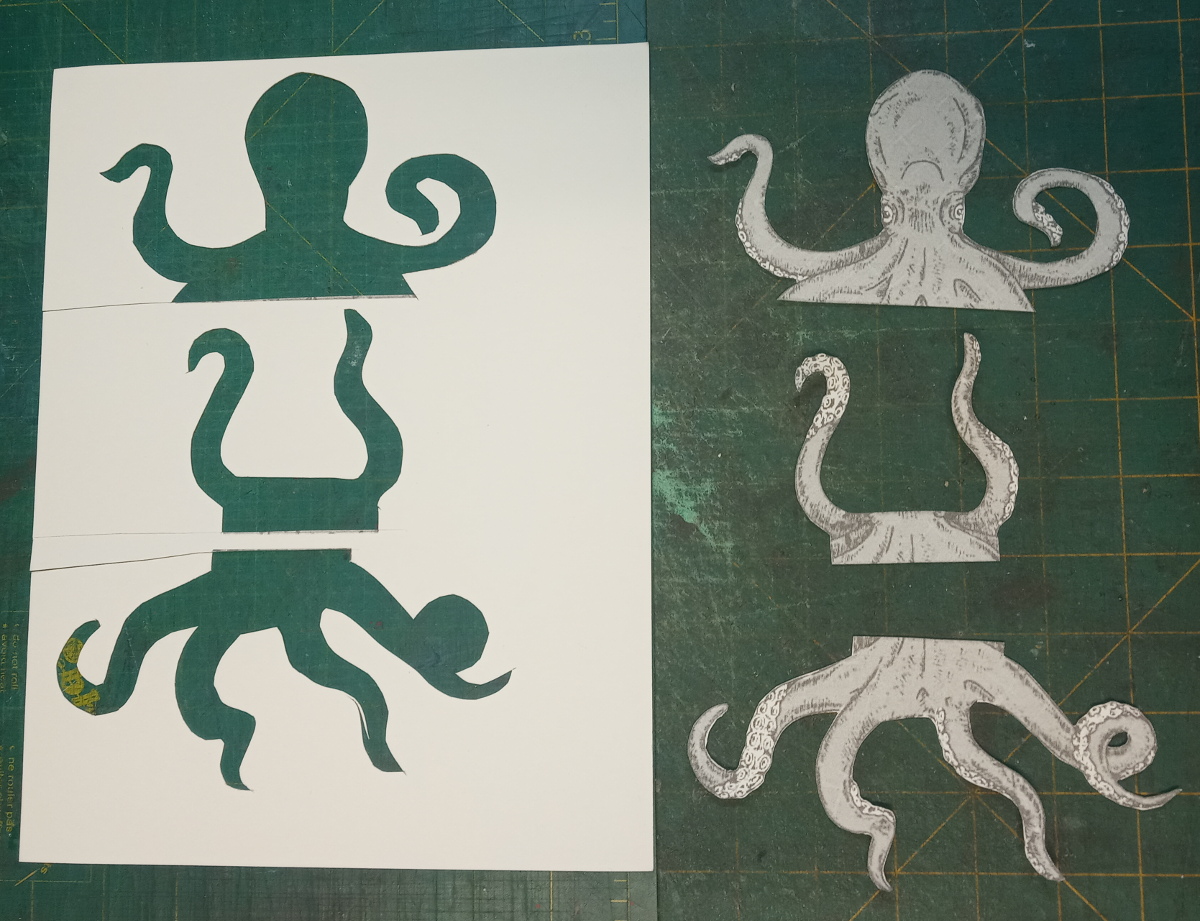
Print and cut out shapes

Step 2
The second sheet of cardstock should be folded in half for the base. Starting with the 4-tentacled piece of the octopus, fold it in half as shown here.
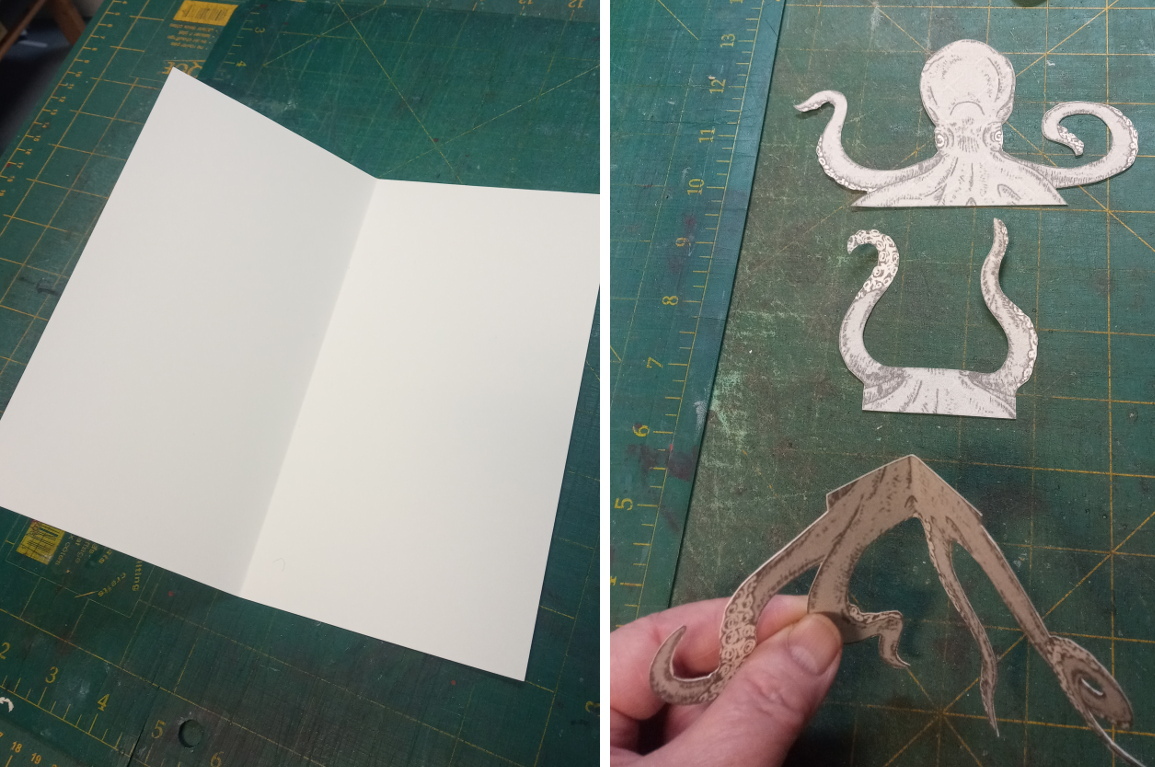
Fold pieces

Step 3
Apply some glue to the back of the 4-tentacled piece of the octopus and attach it to the base card. I pasted only the central part and left the ends of the tentacles loose, but you could glue it down entirely. Make sure the folds are aligned.


Step 4
The two other parts of the octopus need to be folded along the lines as shown in the following photograph.


Step 5
Fold as in the following photograph and cut the little corner bit off both pieces.


Step 6
On the back of these pieces, apply glue to the tabs as shown here.


Step 7
With the octopus head piece bent at an angle, as shown, attach it by sticking the tabs onto the card, overlapping the bottom half of the octopus that is already attached to the base. (The second photo here shows it from the back.) Make sure the centre folds are all aligned.


Step 8
The last piece is attached the same way, nestled in behind the head. Make sure the centre folds are all aligned.

Now when the card is closed, the octopus should fold flat, and it should pop up when the card is opened. Voila!


Card design and tutorial by Rhonda Miller

Saturday, December 23, 2023

Customizing the size of the Diagonal Pocket

Diagonal Pocket FoldersThe subtitle for this post is: "How to make giftcards look a bit less impersonal but let me ramble a bit first."

The Diagonal Pocket is one of the many interesting folded structures devised by Hedi Kyle. It is made from a single sheet of paper and folds up to have a set of pockets and a wrap-around closure to keep itself neat and tidy. There are instructions for making this in Hedi Kyle's book The Art of the Fold and also in Helen Hiebert's book, Playing With Paper and there are also a lot of instructions floating around online.

Comparing the instructions in Kyle's and Hiebert's books, you will find that they differ slightly. I actually prefer Hiebert's version, and I don't know if the difference is a refinement of Hiebert's devising or if Kyle originally did it the same way and then later simplified it.

If you look at the following photo, the difference is seen at the left side of those folders. Following the instructions in Kyle's book, the outer layer is a single thickness where the reverse side of the paper is visible. If you use Hiebert's instructions, that same bit will be a double thickness making it more durable (hence my preference for it) and the reverse side of the paper is hidden.
Diagonal Pocket Folder comparison
I became aware of this difference recently when I wanted to customize the size of the diagonal pocket to fit specific items. In this case, I wanted to make it suitable for holding standard giftcards. Hiebert's instructions indicate that you should begin with a sheet of paper that is 20" X 12" and the resulting folder is 6" X 4". This size is, in fact, perfect for the larger style of giftcards. However, I wanted to scale it down for small giftcards. I looked up the instructions in Kyle's book because she discusses how to change the size. She says it will work at any size if your paper's length and width are a 4:3 ratio. (This is when I realized her instructions were different since Hiebert's 20 x 12 recommended size doesn't follow the 4:3 ratio rule.)

All of that is just to say that when I came up with a size that fits my giftcards, I was using Hiebert's folding instructions. So if you want to try it, her instructions will give the best fit using my dimensions. I started with a sheet of paper 12" long and 8.25" wide. Then, using Hiebert's folding instructions, there will be three folds that are 2.25" apart as shown here.
Diagonal Pocket Folder paper dimensions 12 inches by 8 and a quarter inches
If you have Hiebert's book, then proceed as per her instructions. I also sifted through some online tutorials and found the blog, Encasing Structure, which has decent instructions with photos, so you could start there. Substitute my dimensions if you want to make it fit small giftcards. (It's also a suitable size for holding standard business cards.) Use some seasonally appropriate wrapping paper and it's a quick way to make giftcards a little more personal!
Diagonal Pocket Folders containing a variety of giftcards

Submitted by Rhonda Miller


Thursday, January 12, 2023

Making Small Bookbinding Weights

This week, NSBAG had its first meeting of 2023. At this meeting we undertook a group project to make ourselves some small bookbinding weights! Here's the result:
bookbinding weights
For anyone who has spent time around seasoned bookbinders, you've maybe heard how they made their small weights by filling boxes with their old lead type or some discarded lead shot that they found in a shed. That's great, but what to do if you don't have a ready supply of old lead?

You can purchase lead, of course, although it is quite expensive. You can also buy small weights, ready-made, so that's certainly an option. But, if you just want to make a couple of small weights without spending a lot of money, there are other possibilities. Definitely check around your home and see if you have any small, heavy items that could be used, such as steel ball bearings or heavy bolts, nails, etc, that could be used to fill up a small box.

Here's how we did it.

We started by making a small box with book board. These are the dimensions we used, in inches.
Assemble the box, using PVA glue, leaving the top of the box open, of course.
For our weight-making project, we had a few chunks of lead but not enough to fill all the boxes. So we put the chunks of lead in the box and then filled the rest of the space with aquarium gravel.

Then, to really fill it up, we poured glue in as well.

When you're satisfied with what's inside the box, attach the lid. Then it's helpful to place a weight on top of the box and let the glue dry for a while.

We covered our weights with a durable, starch-filled book cloth. There are various approaches to covering a box and all are acceptable here. We prepared the covering as a single piece like this:
Glue the cloth to one side of the box and rub it down firmly. Then work your way around the box, gluing one side at a time, firmly rubbing the cloth each time to remove any air bubbles. Let that dry for a while and then your finshed weight is ready to use.
Certainly, the beauty of making your own small weights, is that you can make them whatever size you find useful or whatever shape best suits the heavy object(s) inside.

It was lovely to see everyone who came out for the meeting this week. See you next time!

Submitted by Rhonda Miller