Monday, January 29, 2024

Future Bookbinders

By Heather Loney

A year ago, a class of Grade 2s took the first steps in bookbinding. They learned to fold paper, glue paper covers on thin book board and put together an accordion book. I learned that school glue gets EVERYWHERE.

     This year, January 2024, with a class of twenty-one Grade 2/3s, we attempted accordion books again. Preparation is of key importance: 50 cover boards were cut (always a few extras for those kids who do something totally unexpected), 50 papers cut for the covers, corners trimmed and then 50 cover images drawn on the papers so kids are able to place the book board in the right spot, and 25 long strips of paper were prepared.  And then, the preparations were repeated for a smaller size of accordion book. (Book sizes were determined by a collection of off-cuts from Gaspereau Press.) Paper folding was a bit of a challenge for some; I am glad that there were extra prepared papers.

     With memories of wet glue dripping on desks, over books, and on chairs, glue sticks were used to complete the work. 22 small accordion books with cereal box covers (our prototypes) and 22 medium accordion books with proper book boards were completed!


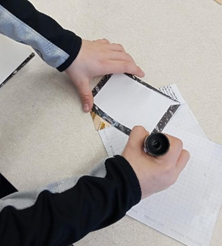
     The following week, we attempted ‘sewing’ books. Again, preparations included cutting book board (thank you My Handbound Books for the off-cuts), paper for the signatures cut, pre-folded and pre- punched (can you imagine letting 7 and 8 year olds using a stiletto or an awl without individual supervision!), paper for covers cut, corners trimmed and drawn on to show the placement for gluing the book board, 50 end pages, along with 2 strips of book-cloth each for spines, and finally, 22 pre-threaded blunt-end needles, with a small lesson on how to pull the thread through the signature without having the needle come off the thread.  We were ready!


     Most of the class followed the directions with a 5-hole pamphlet stitch with little difficulty – a few needed one-on-one assistance (my 8 year old grand-daughter/assistant and I ran around to each group checking progress).

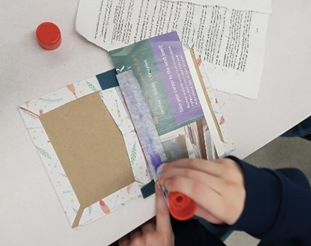
     We fixed the signature to the hard cover using the ‘agenda book’ method that Rhonda taught in a NS Craft class last fall: the signature is sewn with a spine-wide strip of book-cloth which is then glued to the inside of the spine book-cloth on the completed covers.  Colourful end pages were added for a finished product.

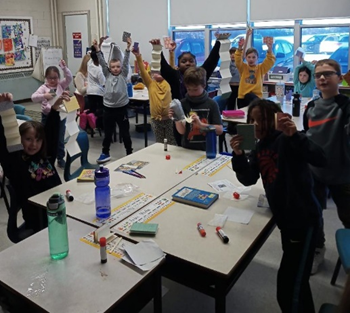
     A class of 7 and 8 year olds proudly held up their finished sewn books and then ran around showing off their work and checking out their classmate’s books.


Sunday, January 21, 2024

Making a Pop-up Octopus

Last week, our group gathered to look at some pop-up books and we made some pop-ups too! We started by making some simple cut pop-up shapes then finished with a pop-up octopus card, in many colours!

If you would like to make a simple pop-up octopus, you can follow along right here. You will need two sheets of cardstock, scissors, and glue.

I created this 3-piece octopus image that you can download here as a PDF. This is a one-page document that you can print on standard printer paper though I recommend printing it on cardstock for added strength.

Follow these steps to make your pop-up card. You can click on the photos to make them larger if necessary.

Step 1
Download the PDF, print it, and cut out the three pieces.
Print and cut out shapes

Step 2
The second sheet of cardstock should be folded in half for the base. Starting with the 4-tentacled piece of the octopus, fold it in half as shown here.
Fold pieces

Step 3
Apply some glue to the back of the 4-tentacled piece of the octopus and attach it to the base card. I pasted only the central part and left the ends of the tentacles loose, but you could glue it down entirely. Make sure the folds are aligned.


Step 4
The two other parts of the octopus need to be folded along the lines as shown in the following photograph.


Step 5
Fold as in the following photograph and cut the little corner bit off both pieces.


Step 6
On the back of these pieces, apply glue to the tabs as shown here.


Step 7
With the octopus head piece bent at an angle, as shown, attach it by sticking the tabs onto the card, overlapping the bottom half of the octopus that is already attached to the base. (The second photo here shows it from the back.) Make sure the centre folds are all aligned.


Step 8
The last piece is attached the same way, nestled in behind the head. Make sure the centre folds are all aligned.

Now when the card is closed, the octopus should fold flat, and it should pop up when the card is opened. Voila!


Card design and tutorial by Rhonda Miller

Thursday, January 18, 2024

Printed Matter Exhibit: Gallery Copy Only

Currently displayed at the Anna Leonowens Gallery in Halifax, is an exhibit of work by NSCAD students who have been studying the world of printed matter in all its forms. It is an amazing collection of work featuring many different book and paper forms and structures, traditional and experimental, interpreted through a connection to printed content.

Shown here (left) is a miniature handbound book by Charles Salmon featuring 13 weeks of typed class notes reproduced at 10% actual size, with final page size of just 1.25" wide and 1.75" tall.

There are 18 artists included in the exhibit with several pieces by each artist so there is a lot to see. The variety of work is indicative of a wonderfully creative and thoughtful group. The range of content in these pieces is so vast it would take weeks to absorb it.

It was thrilling to see how the artists used different structures, forms, scale, and materials to create and enhance the content of their work.

Entering the gallery, I was greeted by a video display of flickering images on one wall. There was hanging text in the corner and connected text in the windows. There was also a small table with a newspaper cone and discarded milk glasses which, I assume, made a splash at the opening reception. Another wall was hung with carved wooden panels and various printed objects.

The first to grab attention, though, was the wall covered with this colourful collection of birthday cards (right). The birthday card display was created by Annette MacLellan. Every day of the year was represented and each card had a personalized note inside. I found my birthday card, and the sentiment wished for me that my favorite thing might be on sale, how nice!

There were a number of well-executed pieces by Charles Salmon in this exhibit including the miniature book shown above. Charles' work demonstrates an impressive attention to detail and refinement including pieces that showcase his skills in bookbinding, paper folding techniques, and box making. His choice of content and materials are wonderfully complemented by the structures he uses for his artist's books.

A small sample of his work is shown here (below), including a striking folded paper structure featuring literary texts and a thoughtful deconstructed notebook with instructions for the user/reader.
Work by Charles Salmon

Work by Rhynne Winstead and others There is an extensive collection of zines made by members of this group exhibit, just a few of them are shown here. Rhynn Winstead's zines, "Seven Confessions from Somebody Who was Once a Child" and "Trap Street," are particularly interesting examples that demonstrate the broad range and uses for the zine format since the the first is more personal content and the second is a newsletter-style zine intended for public distribution.

Rhynn Winstead has several other pieces in the exhibit too, including this beautiful wall-mounted fabric piece (right). Like a hanging scroll, it is illustrated with images and text and it has a flock of origami butterflies fluttering up from the floor.

There is so much to see in this exhibit and this overview only scratches the surface. There are some books made with very traditional techniques and there are also others made of cloth and bingo cards and upcycled cardboard. There are a number of pieces incorporating plastic and unusual materials like chicken wire and trousers and pillows and pencil shavings.

The following are just a few more examples of various book and paper forms that were used, ranging from traditional to unconventional.

Shown clockwise (below): hanging text by Joana Bernardini; Playing cards by Melissa Naef; Newspaper by Cameron Walker; Paper burger by Vesa Muji; Set of three booklets by Chelsea MacDonald; Flexagons by Baily Smith.
Printed Matter Exhibit
Artists included in this exhibit:
Artists Included in the Printed Matter Exhibit
The exhibit was organized by Craig Leonard. "Gallery Copy Only" continues until closing time on Saturday, January 20th, 2024. The gallery is located at 1891 Granville Street, Halifax, Nova Scotia.

Submitted by Rhonda Miller


Tuesday, January 16, 2024

NSBAG Card Exchange

NSBAG is planning a card exchange! Make/print/fold/create an edition of cards and then trade with others in the group.

If you would like to participate in the card exchange, you must register before March 1st, 2024.

To register, just send an email to novascotiabookarts@gmail.com and tell us that you want to participate.

The number of cards you have to make will depend on how many people register for the exchange. (Update: Please bring an edition of 11 cards.)

The exchange will take place at our meeting on May 30th. You will bring your edition of handmade cards to the meeting and trade with each of the others in the group. So, if there are 10 people in the group, you will bring 10 cards and you will go home with 10 different cards made by 10 different people! If you can't attend the meeting, you should arrange to deliver your cards in advance so they can still be included. Anyone who is, or wants to be, a part of the Nova Scotia Book Arts Group is welcome to participate.

The book arts realm is very broad, so you can create your edition using any technique(s) you like. For example, you can make postcards, greeting cards, pop-up cards, or anything you think qualifies as a card. They could be letterpress printed, or marbled, or collaged. You could do gel printing, paper cutting, or calligraphy. Make lino prints, create a volvelle, or even design matching envelopes if you wish. Maybe use handmade paper, interesting folds, or unusual techniques. Keep it primarily paper-based, but otherwise, do whatever you want!
Handmade Cards